
# Emulated NVRAM
So this section is for those who don't have native NVRAM, the most common hardware to have incompatible native NVRAM with macOS are X99 and some X299 series chipsets:
- X99
- X299
For B360, B365, H310, H370, Z390 users, make sure you have SSDT-PMC (opens new window) both under EFI/OC/ACPI and config.plist -> ACPI -> Add. For more info on making and compiling SSDTs, please see Getting started with ACPI (opens new window)
Note: 10th gen CPUs do not need this SSDT
# Cleaning out the Clover gunk
So some may not have noticed but Clover may have installed RC scripts into macOS for proper NVRAM emulation. This is an issue as it conflicts with OpenCore's method of emulation.
Files to delete:
/Volumes/EFI/EFI/CLOVER/drivers64UEFI/EmuVariableUefi-64.efi/Volumes/EFI/nvram.plist/etc/rc.clover.lib/etc/rc.boot.d/10.save_and_rotate_boot_log.local/etc/rc.boot.d/20.mount_ESP.local/etc/rc.boot.d/70.disable_sleep_proxy_client.local.disabled/etc/rc.shutdown.d/80.save_nvram_plist.local
If folders are empty then delete them as well:
/etc/rc.boot.d/etc/rc.shutdown.d
# Verifying if you have working NVRAM
To start, open the terminal and run the following one line at a time:
sudo -s
nvram -c
nvram myvar=test
exit
Now reboot and run this:
nvram -p | grep -i myvar
If nothing returns then your NVRAM is not working. If a line containing myvar test returns, your NVRAM is working.
Note: nvram -c requires SIP to be off, an alternative is to wipe NVRAM at the boot menu. Reminder you'll need to have the AllowNvramReset.efi driver from OpenCorePkg in your Drivers folder and config.plist -> UEFI -> Drivers.
# Enabling emulated NVRAM (with a nvram.plist)
To enable emulated NVRAM, you will need to configure several things in your EFI and config.plist
Within your EFI:
OpenRuntime.efidriver (this is needed for proper sleep, shutdown and other services to work correctly)OpenVariableRuntimeDxe.efidriver (this is needed for enabling emulated NVRAM functionality - already included with OpenDuet (legacy BIOS only) systems)
And within your config.plist:
- Booter -> Quirks:
DisableVariableWrite: set toFalse
- Misc -> Security:
ExposeSensitiveData: set to0x1
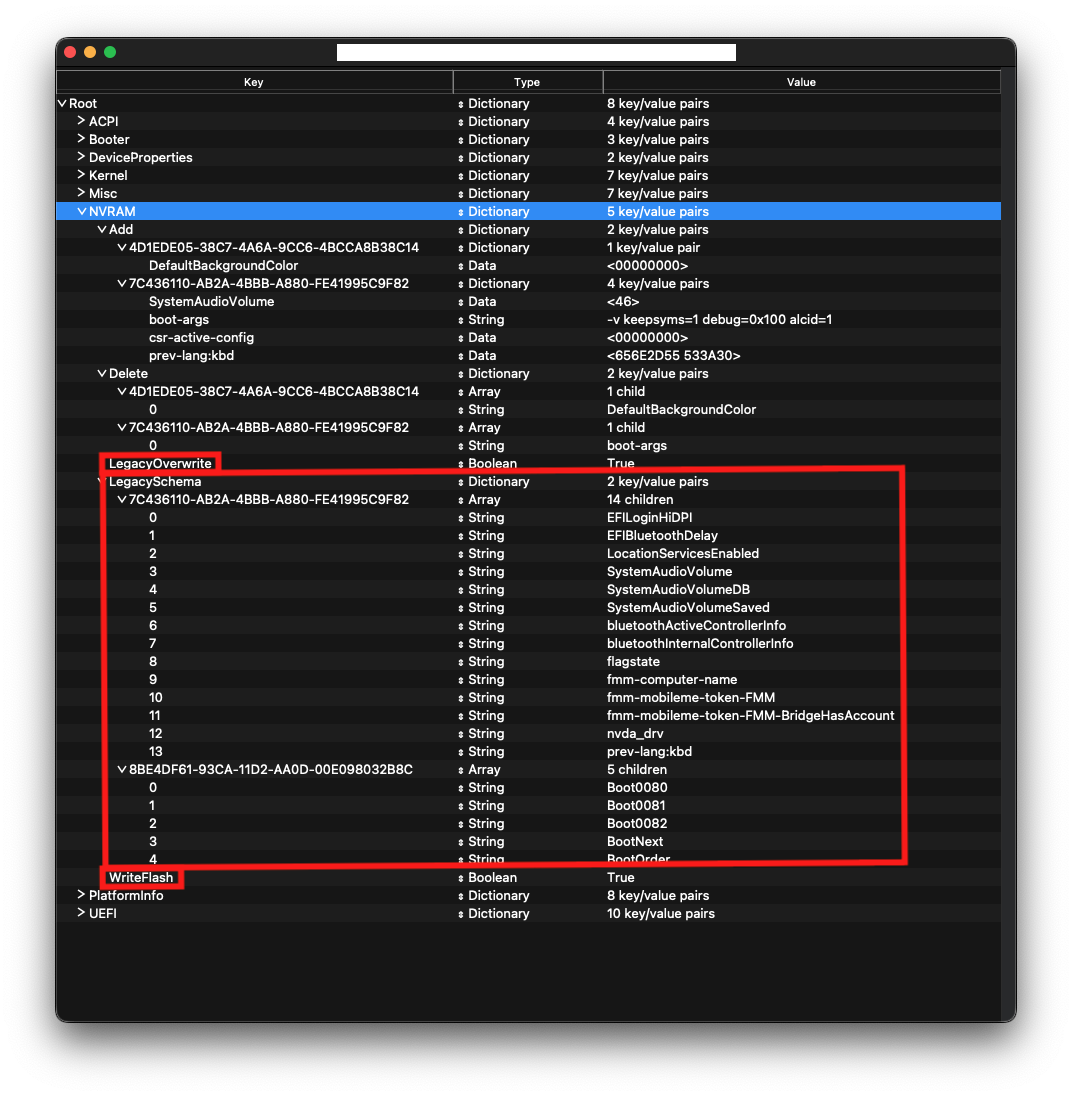
- NVRAM:
LegacyOverwriteset toTrueLegacySchema: NVRAM variables set (OpenCore compares these to the variables present in nvram.plist)WriteFlash: set toTrue
- UEFI -> Drivers:
OpenVariableRuntimeDxe.efi: loaded beforeOpenRuntime.efi(OpenRuntime.efi's entry needs to have a number higher than the one ofOpenVariableRuntimeDxe.efi's entry)OpenVariableRuntimeDxe.efi:LoadEarlyset toTrueOpenRuntime.efi:LoadEarlyset toTrue
Now grab the LogoutHook folder (opens new window)(Inside /Utilities/LogoutHook/) and place it somewhere safe (e.g. within your user directory, as shown below):
/Users/$(whoami)/LogoutHook/
Open up terminal and run the following (one at a time):
cd /Users/$(whoami)/LogoutHook/
./Launchd.command install
./Launchd.command install daemon
./Launchd.command install logout
Replace /Users/$(whoami)/LogoutHook/ with your path (if you placed it in another path)
And voila! You have emulated NVRAM!
The Launchd.command script will now run on every shutdown/reboot of your machine and write any NVRAM changes done to the EFI/NVRAM/nvram.plist.